Thai massage training video techniques
best massage school in Bangkok: video shooting techniques for Thai massage training
A complete production guide for filming Thai massage training videos with clear technique, safe angles, clean audio, useful editing, YouTube context and SEO structure.
Why massage training video is different
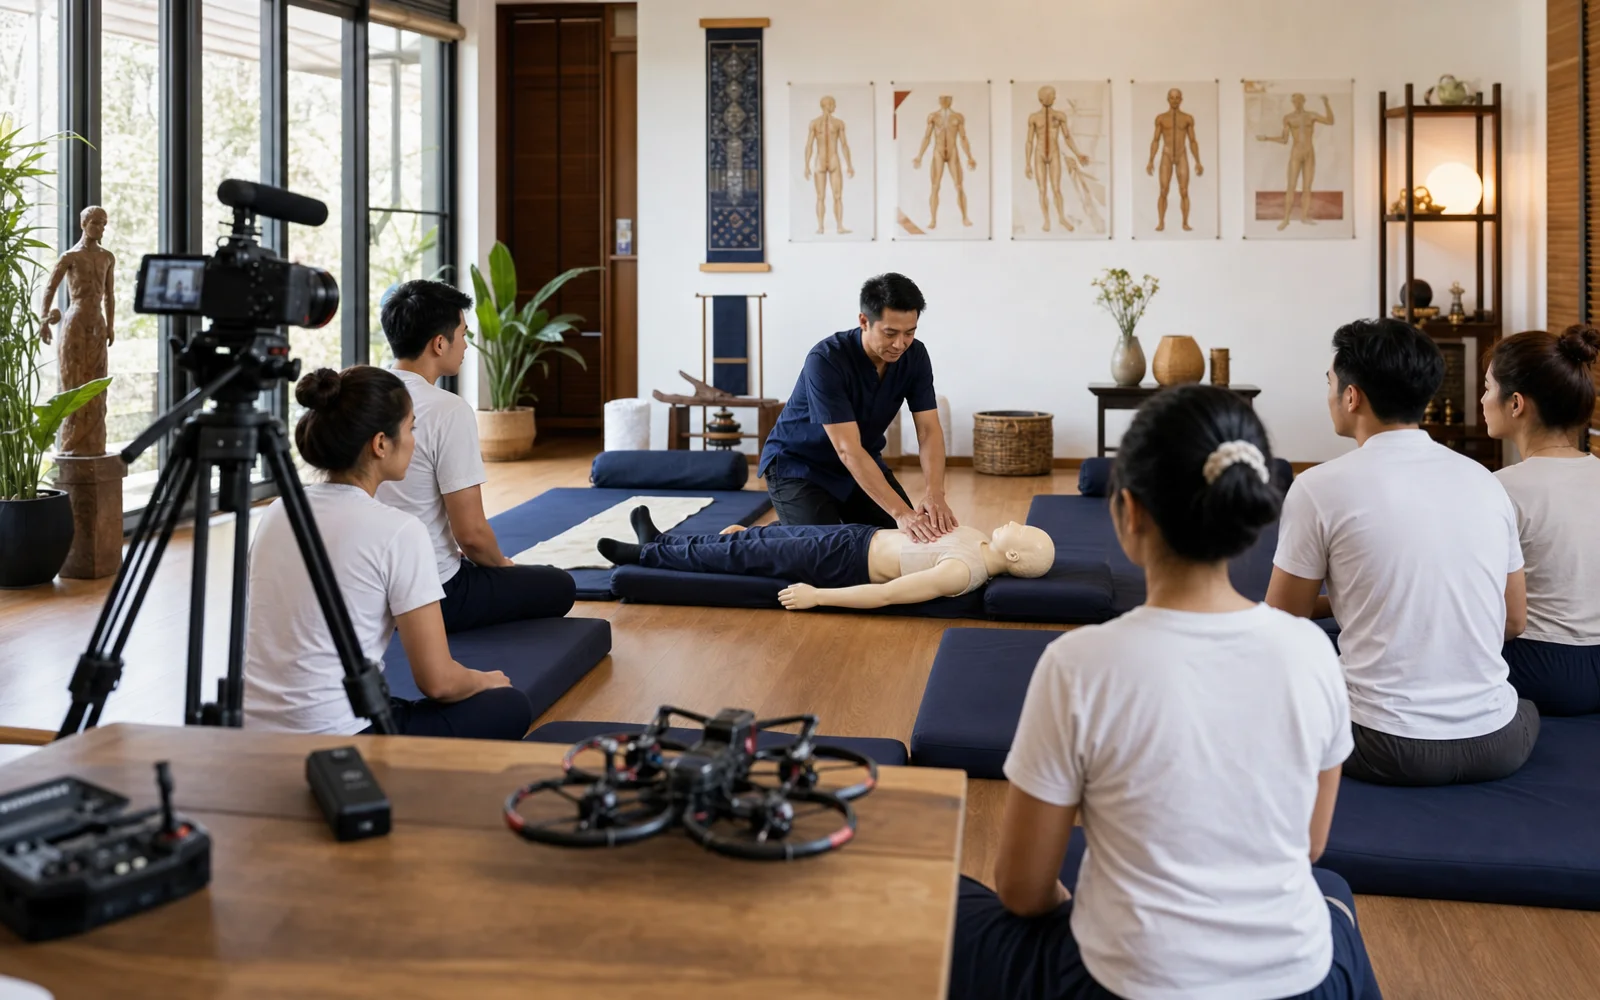
Filming a Thai massage school is not the same job as filming a spa treatment, a relaxation reel or a generic wellness brand film. A spa video can suggest mood with candles, towels, slow hands and a soft soundtrack. A training video has to teach. It has to show posture, sequence, pressure direction, communication, student safety, rhythm, transitions and the reason behind each movement. The camera cannot only make the room look calm. It must help a future student understand how the lesson works.
That is why the first production decision is educational, not visual. Before choosing a lens, angle or drone route, define what the viewer should learn. A video about Thai massage foot pressure needs a different camera position than a video about practitioner body weight. A lesson about sen line theory may need diagrams, voiceover and medium shots of the instructor speaking. A lesson about assisted stretching may need a locked wide angle so the viewer can see both bodies from head to toe without confusion.
The same principle applies to recruitment content. A future student comparing schools wants to know whether the classroom is organized, whether the instructor speaks clearly, whether students can see the demonstration, and whether the practice environment feels serious. When a page references the best massage school in Bangkok, the video should support that claim with visible teaching quality, not just beautiful atmosphere. Trust comes from proof: the way the instructor sets up the posture, corrects a detail, protects the model, and repeats the movement from an angle students can understand.
Start with one learning objective per scene
The easiest way to make a training video confusing is to film too much at once. A good lesson scene begins with one objective. For example: show how the practitioner positions their knees beside the receiver; show where the hand starts before a palm press; show how body weight travels forward; show how the instructor checks comfort before a stretch; show how the student resets between repetitions. If the objective is specific, the camera placement becomes obvious.
Write each scene as a simple line in the shot list. Use language such as "wide angle: full body alignment before palm pressure", "close-up: hand position on calf", "45-degree angle: instructor torso and student leg in the same frame", or "overhead: sequence order from foot to thigh". These notes protect the edit. They also keep the production team from collecting pretty footage that cannot be used in a lesson because the essential information is hidden.
A strong training shoot usually separates three kinds of content. First, the instructor explanation, where the teacher talks to camera or to the class. Second, the demonstration, where the technique is performed cleanly without interruption. Third, the correction, where a common student mistake is shown and adjusted. Those three layers can become a full online lesson, a YouTube chapter, a short social clip or a course landing-page section. Planning them separately makes the final material more flexible.
Build a camera language for Thai massage
Thai massage is physical and three-dimensional, so one camera angle is rarely enough. The viewer must understand distance, leverage, contact point, direction of pressure and the practitioner's body mechanics. A beautiful close-up of hands may look professional, but it will not teach the technique if the viewer cannot see the knees, spine and angle of the receiver's limb. The solution is a small set of repeatable camera positions that the audience learns to read.
The master wide shot is the foundation. Place the camera far enough to show both instructor and receiver from head to toe on the mat. Keep the frame stable. This angle teaches spacing and sequence. It is also the editor's safety shot, because it can cover a cut when a close-up fails or when an explanation needs to continue without visual interruption. In a real classroom, the wide shot also shows that the lesson is grounded, supervised and professional.
The 45-degree angle is often the most useful teaching view. It gives depth without flattening the body. It can show the instructor's hands, torso, knees and face in one frame. For palm pressure, assisted stretches and transitions around the mat, a 45-degree camera usually explains more than a straight side angle. It feels close to the point of action but still preserves body mechanics.
Overhead shots are powerful when the lesson needs sequence clarity. They show where the practitioner moves around the receiver, how the body is oriented on the mat, and how left-right repetition works. Use them sparingly. Overhead video can become visually sterile if it replaces human explanation, but it is excellent for chapter summaries, quick recaps, and course modules where students need to memorize order.
Close-ups should answer one precise question. Where exactly is the thumb? Which part of the palm contacts the muscle? How are the fingers relaxed? Where does the instructor's hand avoid direct pressure? A close-up is useful when the teacher says, "notice this detail". It is less useful when the editor cuts close simply because the image looks polished. In education, beauty follows clarity.
Use the YouTube reference with intention
The user-facing reference for this article is https://www.youtube.com/watch?v=bklpDfBAZz0. A YouTube video like this should not simply be dropped into a page as decoration. Use it as a reference for pacing, framing, sequence readability and how much context the viewer needs before a technique begins. Watch it once for content, then watch it again with the sound off. Ask whether the viewer can still understand the physical setup. If the answer is yes, the framing is doing real instructional work.
When embedding a video on a course page, write surrounding copy that explains what the viewer is seeing. Search engines and humans both need context. A heading, two useful paragraphs, a descriptive thumbnail, an internal link to related work and compressed supporting images help the video become part of a page rather than an isolated media object. Google's own guidance on video in search, including Google Search Central video best practices, is useful because it reminds publishers that video discovery depends on the page around the video as much as the file itself.
Audio matters more than many schools expect
In a massage training video, audio is not a background detail. It carries the logic of the lesson. A student may watch the instructor's hands, but they learn from the explanation: where to place body weight, how to avoid strain, when to ask for feedback, how to breathe, and why a movement is repeated. If the instructor audio is thin, echoing or covered by music, the video loses educational value even when the images look expensive.
Use a lavalier microphone on the instructor whenever possible. If the instructor moves around the mat, choose a wireless system and test clothing noise before filming. Keep a boom microphone as a backup or as a room tone capture. Record thirty seconds of room tone in the empty classroom so the editor can smooth cuts later. If students ask questions during the session, repeat the question clearly before answering, because the student's voice may not be recorded well enough to use.
Music should be handled carefully. It can support a short school teaser, but it should not compete with instruction. For technique modules, keep music low or remove it completely during explanations. A massage school may be tempted to use calming spa tracks, but that can make a serious lesson feel like promotional ambience. The instructor's voice, contact sounds, mat movement and natural pauses are often more credible.
Lighting should reveal technique, not create glare
Good lighting for Thai massage training is soft, even and honest. The goal is to make hand placement, clothing folds, limb position and instructor posture readable. Avoid harsh overhead lights that create deep shadows under arms and legs. Avoid shiny highlights on skin that make pressure points harder to see. Natural window light can be excellent, but it must be controlled so the brightness does not change halfway through a sequence.
A simple setup works well: one large soft source from the front or side, a little negative fill if the room becomes too flat, and practical room lights kept consistent. If the school has warm wood, blue mats and cream bolsters, keep that color palette natural. Overgrading the image into a glossy spa look can make the training feel less authentic. Viewers should feel that this is a real classroom, not a staged treatment advertisement.
Before filming the full lesson, record a thirty-second test. Look at the instructor's hands, the receiver's clothing, the mat edge and the background posters. If the most important details are readable at normal playback size on a phone, the lighting is probably doing its job. If the image only looks clear on a large monitor, move the light closer, simplify the background or change the camera angle.
Protect consent, modesty and safety
Massage education requires a respectful production protocol. Everyone visible in the frame should know where the video will be published: internal course platform, YouTube, social media, website, paid ads or student-only materials. Written releases are important, but the on-set culture matters too. Students should be able to step out of frame without pressure. Models should understand which parts of the body will be shown and how close the camera will be.
Clothing should support the lesson and protect the participants. For Thai massage training, loose but not baggy practice clothing is usually better than spa towels. It makes the video more modest and often more useful, because the viewer can see posture, knees, hips and shoulders without the ambiguity of draped fabric. If a close-up risks feeling invasive, change the angle or use an instructor demonstration on a mannequin, prop or diagram.
Safety should be filmed as part of the technique. Show the instructor checking comfort. Show the setup before applying pressure. Show the student's alternative position if a stretch is too intense. Show how the practitioner exits a posture. These moments may seem slower than the main technique, but they are exactly what makes a training video trustworthy. They also distinguish a school from a generic online tutorial.
Plan the complete shot list
A practical Thai massage training shoot can be organized into a repeatable shot list. Start with classroom context: exterior or entrance, reception if relevant, mats prepared, students arriving, instructor greeting the class and course materials ready. These shots are useful for recruitment pages and help future students imagine the environment before they enrol.
Then film the instructor introduction. Use a medium shot with eye line close to camera. The instructor should explain the lesson objective, the body area, the level of the technique and any safety note. Keep this direct. A clear sixty-second explanation often does more for credibility than a long inspirational introduction.
Next, film the technique demonstration from the wide shot. Let the instructor complete the sequence without too many cuts. After that, repeat the key sections from 45-degree and close-up angles. If the sequence is long, break it into chapters: setup, first contact, pressure rhythm, transition, repetition on the second side, finish and reset. The editor can then build a lesson that feels structured instead of improvised.
Finally, capture correction moments. Ask the instructor to show one or two common mistakes: leaning from the shoulders instead of using body weight, placing a knee too close to the receiver, rushing a transition, or losing contact before changing position. Film the wrong version briefly, then the corrected version clearly. This type of content performs well because it feels useful immediately.
Direct students and instructors on camera
Most massage teachers are comfortable teaching in person, but camera performance is a different rhythm. The instructor does not need to become an actor. They need to slow down, name what they are doing, pause before important details and restart cleanly when a sentence becomes tangled. A director can help by giving simple cues: "hold that position", "repeat the hand placement", "explain why", "look to the students", "now say the safety cue once more".
Students should also be directed gently. They should know when to watch, when to practice, when to stay still and when to ask a planned question. Real student reactions can make the school feel authentic, but uncontrolled movement can ruin a technical shot. During close-ups, keep the background calm. During wide class shots, let the room feel alive.
Continuity is important. If the instructor demonstrates on the right leg in the wide shot and the left leg in the close-up, the edit may become confusing. If the student changes position between takes, the viewer may think a step is missing. Assign one person to watch continuity: mat direction, bolster location, instructor side, receiver position, props, clothing and sequence order.
Use movement carefully
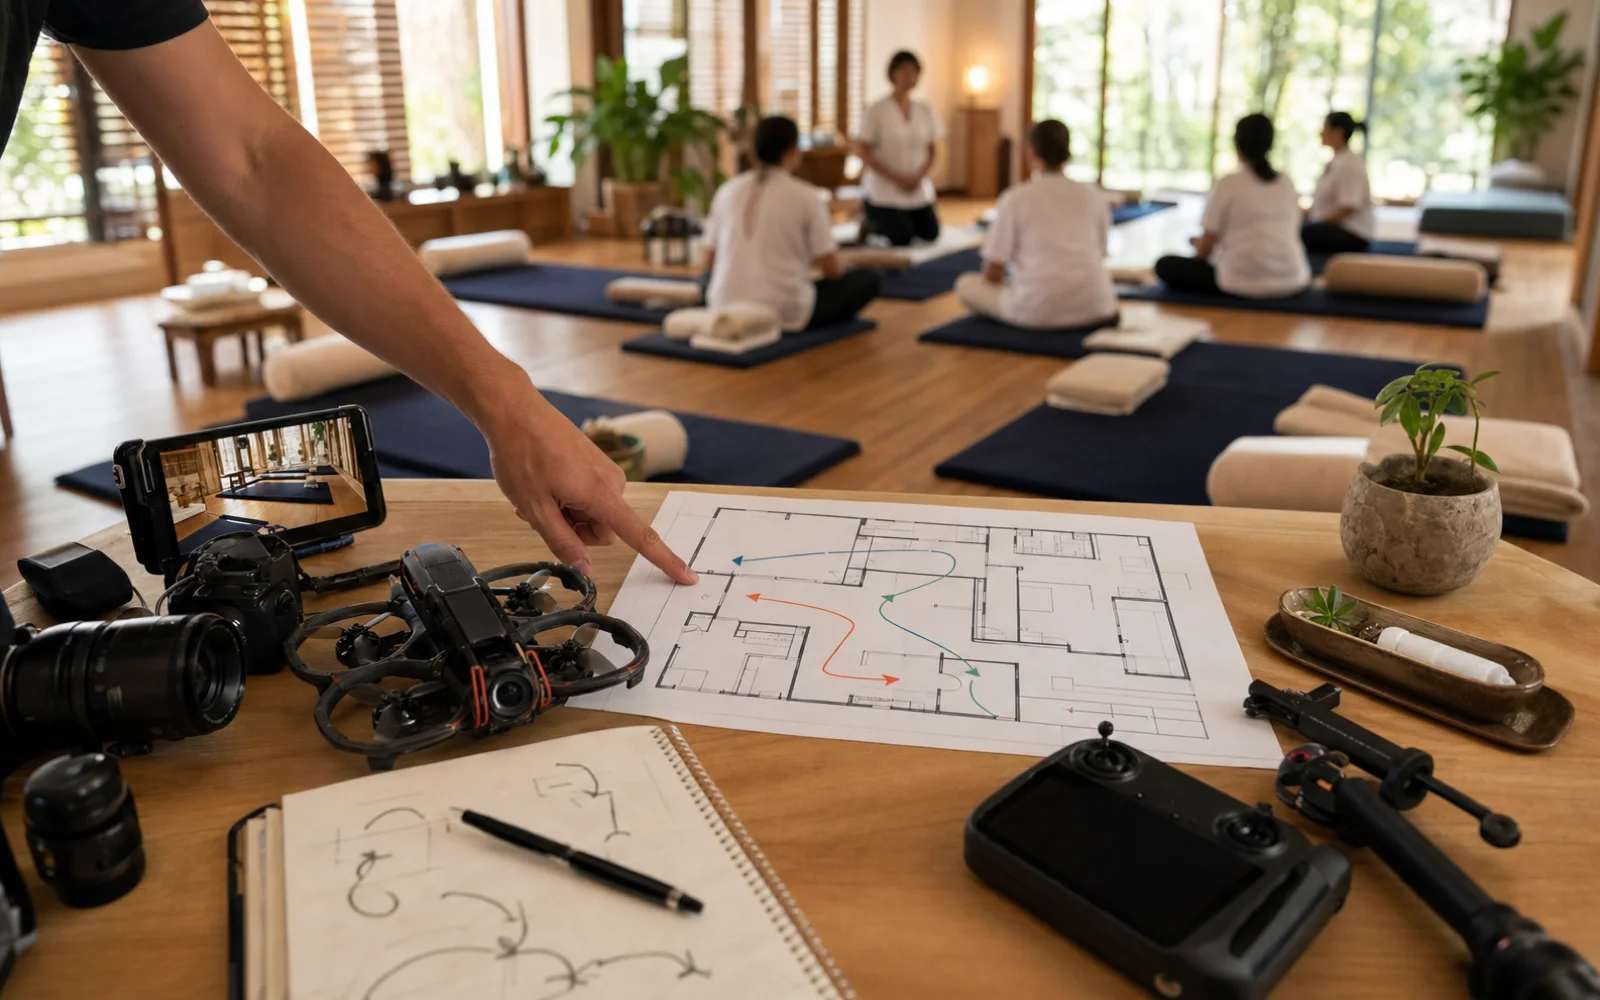
Because Olivier Guy's work is rooted in FPV and dynamic camera movement, it is tempting to think movement should dominate every video. For training, movement should be used with restraint. A slow push-in can emphasize a detail. A gentle slide can reveal instructor alignment. A controlled FPV or gimbal route can introduce the school environment, moving from entrance to classroom, from equipment to demonstration, or from teacher to students. But the core lesson should remain readable.
A moving camera is strongest when the subject is not also moving too much. If the instructor is performing a complex transition, lock the camera. If the instructor is explaining a static posture, a slow camera move can add depth. If the shot is for a landing-page hero rather than a lesson module, a more cinematic route can show atmosphere and scale. The production language should shift depending on whether the asset is education, recruitment or brand storytelling.
Internal proof helps here. Linking from a training article to a production page such as Justine Gallice Teaser, or to the certified FPV drone pilot page, gives readers a path from advice into portfolio and contact context. It also keeps the blog connected to the rest of the site rather than leaving the article as a standalone SEO island.
Edit for learning, not just polish
The editing timeline should follow the student's mind. Begin with the objective, then show the complete movement once, then break it down. Use chapter titles when the lesson is long. Use simple labels only when they help: "setup", "hand position", "pressure direction", "student feedback", "transition". Avoid covering the screen with decorative text. The viewer came to understand technique, not to watch a motion-graphics show.
Keep cuts motivated. Cut from wide to close-up when the instructor names a detail. Cut back to wide when body mechanics matter. Hold the shot long enough for the viewer to process the movement. In massage education, speed ramps and fast montages can damage comprehension. Use them for teasers, not for core instruction.
Subtitles are essential. Many people watch training references without sound first. Others are non-native English speakers or are studying in a multilingual environment. Captions also help search, accessibility and course usability. If the instructor uses Thai terms, keep the spelling consistent and consider adding a short explanation on first mention.
Create social clips without weakening the lesson
A long training shoot should produce more than one long video. Plan short clips during production: one safety tip, one posture correction, one common mistake, one classroom atmosphere shot, one instructor introduction and one student-practice moment. These vertical cuts can support Instagram Reels, YouTube Shorts, TikTok, Facebook and Google Business Profile posts. They should be useful, not clickbait.
For vertical clips, protect the center of the frame. Do not assume the editor can crop a horizontal wide shot without losing the instructor's hands or the receiver's body. When possible, record a dedicated vertical take for key tips. The instructor can face camera, explain one point, then demonstrate it in a compact frame. A series of practical micro-lessons often builds more trust than a generic promotional montage.
Each clip should point back to a deeper resource: the full lesson, the course page, the school blog or an enquiry page. That is where the SEO structure matters. Social attention is temporary; a search-friendly article can keep answering questions long after the shoot day.
Publish the article and video for SEO
An SEO-friendly massage training article needs more than keyword repetition. It needs a precise title, a meta description that promises real value, a clean URL, descriptive image alt text, internal links, a relevant external reference, a video embed, and sections that answer the questions a future student or school owner actually has. A phrase like "how to film massage training videos" should be supported by practical camera, audio, lighting, safety and editing advice.
Use the YouTube title and description carefully. Include the school name, the technique category, the learning objective and the city when relevant. Add chapters if the video is long. Choose a thumbnail that shows the instructor, the mat and the teaching action clearly. A thumbnail of a candle or empty room may look relaxing, but it does not communicate education. For a school, clarity usually beats mood.
On the website page, place the video near explanatory copy rather than at the very bottom with no context. Add internal links to portfolio, contact and related guide pages. Use compressed WebP images so the article loads quickly. Make sure the canonical URL, sitemap and Open Graph image are correct. If the article is meant to support a school such as Nuad Thai School, keep the anchor contextual and natural instead of forcing it into unrelated text.
Production checklist
- Build every shot from a learning objective before choosing camera movement.
- Use wide, 45-degree, overhead and close-up angles to show posture, hand placement and sequence safely.
- Record clean instructor audio, consent, continuity and SEO assets during the same production day.
- Confirm consent forms, publishing channels and whether students can appear in public marketing materials.
- Record instructor lavalier audio, room tone, backup audio and at least one clean explanation take for each technique.
- Capture horizontal lesson footage, vertical social tips, thumbnail stills and classroom atmosphere during the same session.
- Keep the edit slow enough for learning and create separate teaser cuts for marketing channels.
- Publish with descriptive headings, alt text, video context, internal links and a clear enquiry path.
The best training videos feel calm because the production is organized. The camera knows why it is there. The instructor knows which detail to explain. The student knows where to look. The editor knows how the lesson should unfold. That combination creates a video that can teach, recruit and support search visibility at the same time.